Water damage to your ceiling is never fun — it’s stressful, unsightly, and if left untreated, it can lead to mold, structural weakening, or costly repairs. Whether it’s from a leaky roof, a burst pipe, or an upstairs bathroom mishap, here’s what you should do as soon as you spot water damage on your ceiling — along with helpful product suggestions to make the job easier.
HomeFixAdvisor is reader-supported. We may earn a commission through products purchased using links on this page. Learn more about our process here
1. Act Fast and Stay Safe
First things first — safety comes first. If there’s bulging or sagging, water could come pouring down at any moment. Move furniture, electronics, and valuables out of the way.
💡 Helpful Tool: A large bucket or plastic storage bin can be used to catch water without splashing.
2. Find and Stop the Source
Identify whether it’s a roof leak, pipe burst, or overflowing fixture. Shut off your home’s water supply if needed.
🛠️ Recommended: A digital moisture meter can help you track down hidden leaks or confirm that an area is fully dried.

3. Document the Damage
Before you clean up, take plenty of photos and videos for your insurance claim. Don’t forget close-ups and wide shots of the area.
📱 Tip: Use a tripod phone holder or portable ring light if lighting is bad.
4. Dry the Area Thoroughly
Use fans, dehumidifiers, and open windows to dry the ceiling and surrounding space.
✅ Must-Have: A powerful dehumidifier can pull excess moisture from the air fast — essential for preventing mold.

✅ Optional: A high-velocity floor fan helps circulate air quickly.

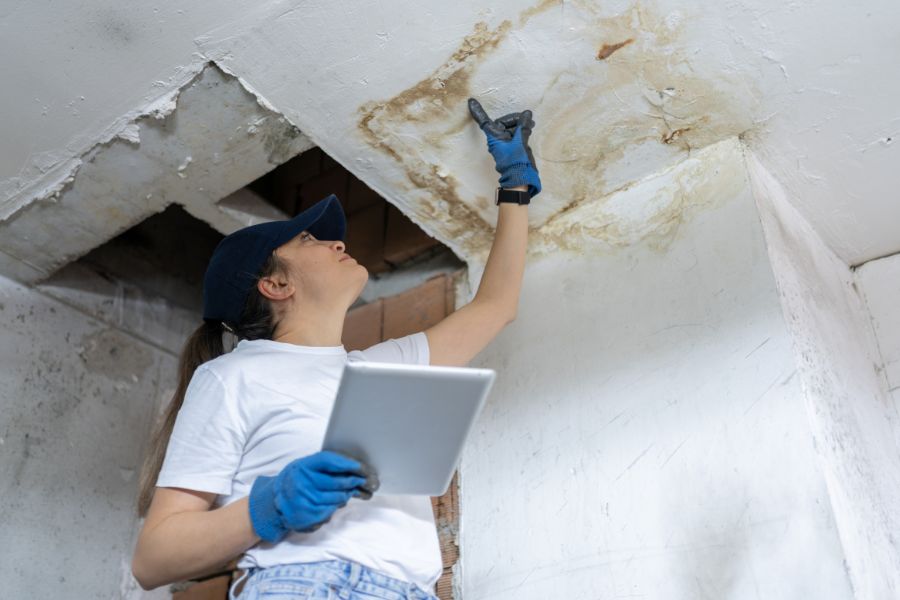
5. Inspect for Mold and Mildew
Mold can show up fast — watch for black or green spots, especially in corners or insulation.
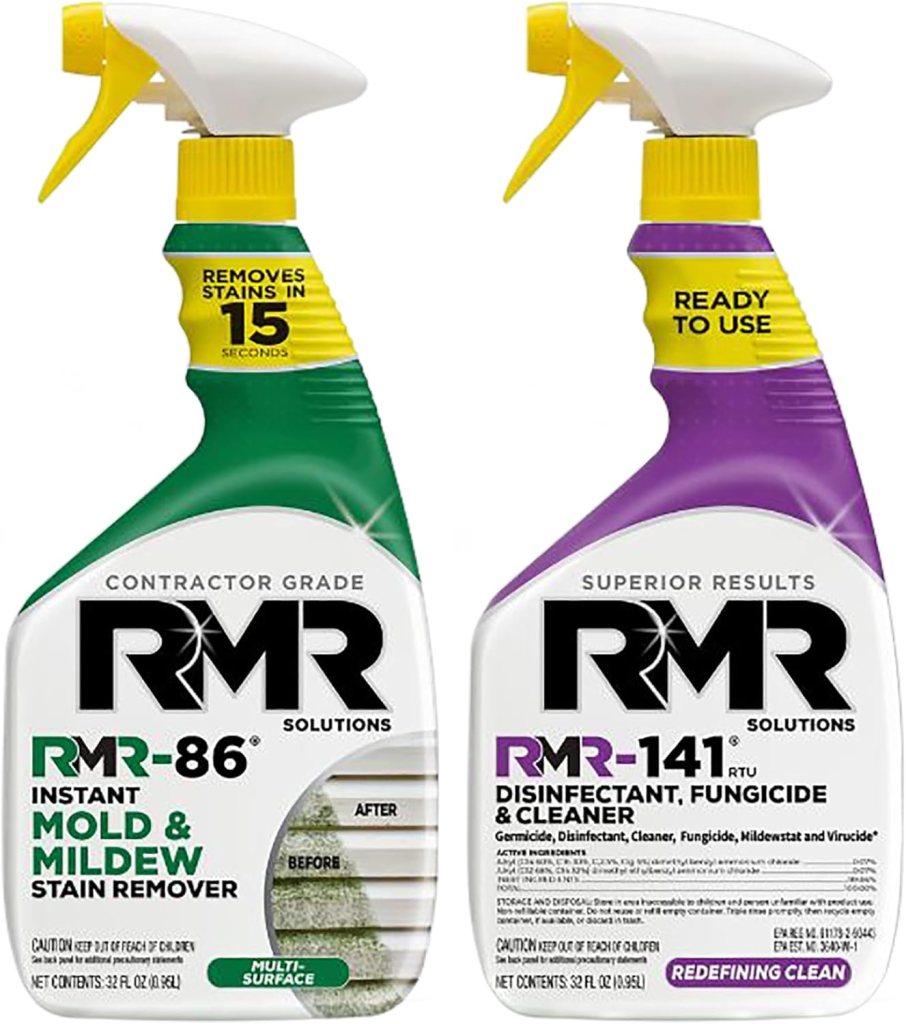
🧼 Recommended: A mold removal spray that’s safe for drywall can help if you catch it early.
⚠️ Serious Cases: Call a professional if it’s widespread.
6. Assess the Damage
Minor water stains can be primed and painted. Sagging or soft drywall usually means you’ll need to cut and replace a section.
🔧 Tools to Consider:
- Drywall repair kit for patching small areas.
- Utility knife and putty knife set for removing damaged sections.
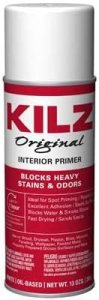
- Stain-blocking primer spray or paint, like Kilz or Zinsser.

7. Repair and Restore
After removing any damaged drywall:
- Patch the area with new drywall or a repair patch
- Apply joint compound and sand smooth
- Use a primer that seals in stains to avoid bleed-through
- Repaint with a ceiling-matching color
🎨 Handy Product: A ceiling paint touch-up roller makes blending repairs easier.
8. Prevent Future Damage
Once everything’s fixed, take steps to stop it from happening again:
- Fix the original leak
- Keep gutters clean
- Insulate pipes
- Install smart leak detectors under sinks, in the basement, or near appliances
🔍 Smart Choice: A Wi-Fi water leak detector will alert your phone if it senses moisture. Great for peace of mind!
Final Thoughts
Ceiling water damage can be overwhelming, but with the right tools (and fast action), you can handle it like a pro. Bookmark this guide and keep a few of these repair essentials on hand — they’ll come in handy when you least expect it.

Leave a comment